Character Animation Eliezer Girma
For this specialism module, I've picked character animation as the field I'd like to specialise in.
In this Blog portfolio, I'll be displaying examples and projects of my work that I've been doing for character animation, with my latest project, made particularly for this module, at the very bottom of this blog portfolio.
My Progression and Practice Of My Specialism
Within this section I'll briefly be talking about some side projects I did during this term and what it is they taught me about in character animation. These little projects contributed heavily in my animated character performances for my main project and its final product.

The Importance Of Using References
In some side projects I've learnt that referencing will be the very foundation of your animatic. It helps you understand certain key poses and movements and how they should be implemented, whether its understanding its weight or its timing.
Making your real life reference yourself is even better as you get the opportunity to find key camera shots while your acting and get to make specific character expressions for your character animation.
(A2)
Studying Movement In Animation
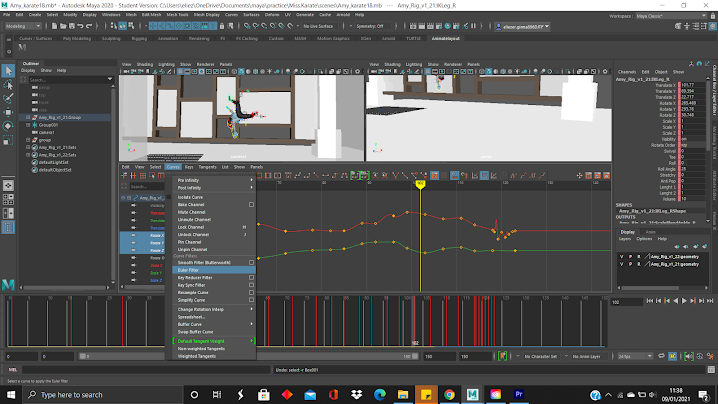
I also read and researched some things to get a better grasp on the motion and movement of animation. For example, I bought "The Animators Survival Kit" to pick out things to learn from, for example I learnt how there should be an arc motion to character movement, with arced over poses (page90 - 92)(example of me implementing this lesson shown at picture A4).
I mostly used this book a more practical manner, where I was reading it while I was animating. I do this a lot while animating, I either research things online, read books or watching videos to what I should be doing or how I can fix my problem. Doing so gave me better insight on certain movements and skills and how to do them, which heavily aided my skills and work flow for my final project.
(A3)
"My Cat Wont Budge!" Project
This section will explain the pre-production, planning and final render clip of my main project for the module CR5001.
Script
The "My Cat Wont Budge!" is a short clip, based of the interaction between a desperate house owner named Dottie and a shiftless cat named Mr. Buttons, and how Dottie sorely attempts to get Mr. Buttons to pay attention and go outside with her.
I first made the script of this idea because it gives a clear enough direction to where I'll be heading during its pre-production and If I ever want to change up my idea I could easily edit it. I've learnt to be shortly descriptive in my writing a little bit more but still descriptive enough for me to follow through in my animation and live action reference.
(B1)
Mood Board
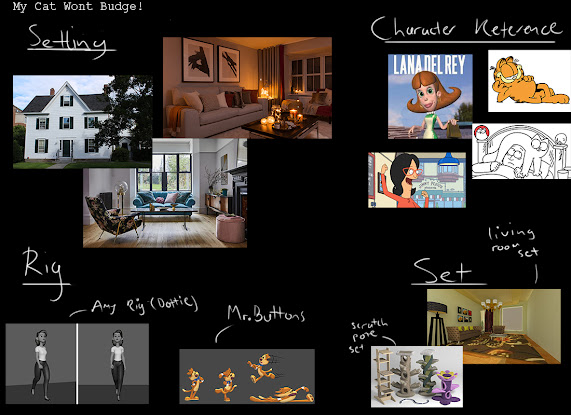
The Mood Board contains the setting of an average house and living room, I learnt that setting needs to make total sense to the context of the clip and its characters.
I also made some character references, although I will not be designing the 3D models that I'll be using. Instead the references purpose were to help me identify the type of personalities that my characters will hone. Like how I'll take Garfield's lazy attitude and apply it to the Mr. Buttons character. This taught more about the usefulness of referencing and to how wide an extent I could use it for.
The rigs and model sets and objects I'll be using is also listed below the Mood Board. These 3D assets will be what I'll be using for the animation.
(B2)
Story Board
(B3)
Voice Clip Origins
The original voice clip comes from the movie "Pee-wee's Big Adventure". I found the dialogue funny and entertaining, so I extracted and edited it for my character animation.
(B4)
Reference
This is my own very first live action referencing that I'll be using for my character animation (shown in B5). This took me several hours to make and this was largely due to trying to find the right camera angel and convincing body movements for my reference.
However it did come together well, and I've made a real attempt to follow it through, which is shown if compared with the final render. I've learnt making your own real life reference is far more useful then taking any other reference from the internet because you have full control over it and likewise can make your own directed choices. Like you could act in any specific way you'd want your characters to act as well as make your own decisions to how you want it to be shot. It'll make it far more easier to follow through with and I will attempt this some more in the future.
(B5)
Final Product
This is the final render of my character animation.
(B6)


Comments
Post a Comment